Showing posts with label level. Show all posts

Sunday, September 1, 2013

Stay on the Track (3) Stages of Development

Hallo,
in my third post about my project Stay on the Track I want to tell you something about the different development stages I have passed with this map.

After I got a decent story for the map everything was ready to go ahead and plan the layout of the map.

 
I started with a top down view of the map to get an overview of the map. Such a sketch will help you later to get faster results. If you don't have a clear overview where to place everything what you want in your map, you will fast get stuck with things.

And also don't get stuck on details in the top down view, it is just to get an overview of the map. Not to show the mood or something. You just have to draw the contours of the stuff in your map like on a street map or so.

 After I had finished the top down view, I have started to search for reference pictures of the buildings and assets I wanted to have on the map. For this I can really recommend, Deviant Art, Flickr and of course the google image search. Just be creative, it gives a lot of great websites on the Internet to get some useful references.

If you have enough reference images of the stuff that you want to create, you can first make some sketches of it. That is useful if you want to combine parts of different images, or if you are still not sure how things should look like. But if you think you can build your stuff directly from the references, try so, but I personally made the experience that its worth to invest time to create sketches.

After I got all my references collected and a few sketches made, it was time to start on the map itself.


I started with a blockout of the map. A blockout is useful to get an overview about the dimensions of the map. If you don't like some parts of the map, it is easier to change the size or position of a block instead of a whole detailed building that you have already created. A blockout is also sometimes called greybox, so just basic shapes without textures or details.


After I had finished the blockout of the map I started to add some details to the buildings, but not to the environment.


Once I had the details on the buildings done, I started adding some ambient lights to the map. At this stage you should already be able to get an overview about the look and feel of the map.


In the next step I started to add the textures to the buildings and to start with the displacement work. After this stage the map looked already quite okay.

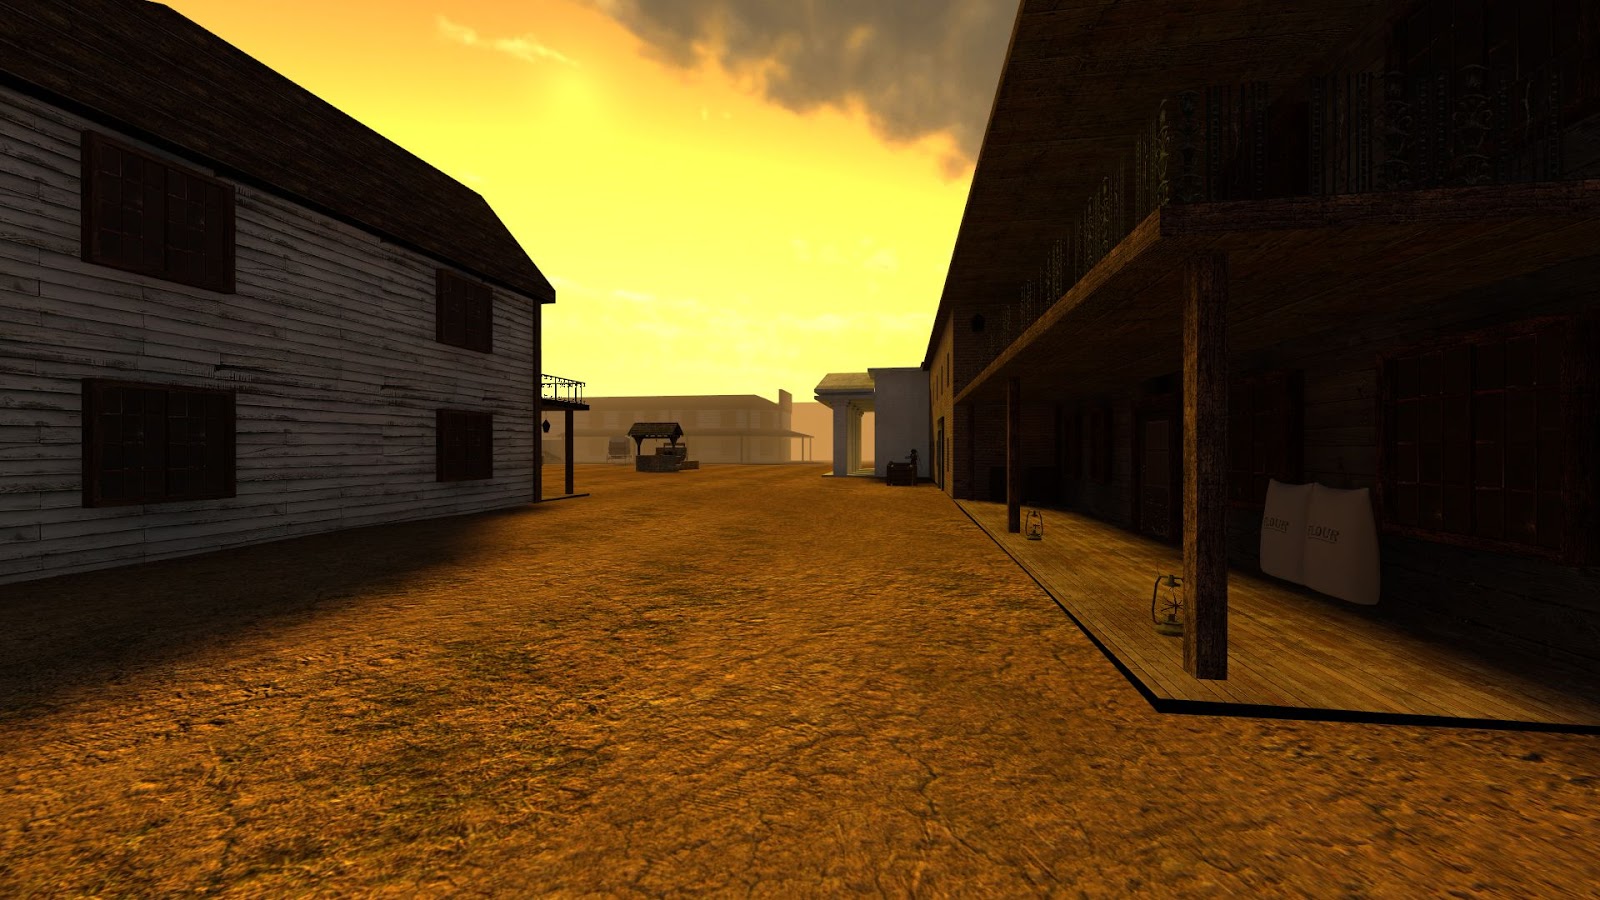
The last but also one of the most important parts was to add more details to the map. Add some props, correct the lighting, and to correct some other little cosmetic things like detail sprites. But the results of this I will show you in my next post.


I hope this little post was useful in an informative or inspiring kind or at least useful in some way ;)
In the next and last part of this series I will show you some screenshots and a video of the final map.
So stay tuned.

Sunday, June 2, 2013

Workflow improvent in Hammer (2)

Hello,
as I said in my other post about useful tips how to improve your work flow in Hammer I will now continue my small guide about that. In my first post I mainly talked about how you can improve your work flow with tweaking some settings in Hammer.
But another important thing for a good work flow are shortcuts beside good preferences in Hammer.
I want to give you some tips for the best Hammer settings after my experience. I ignored most of the settings in Hammer for a long time, but if you spent a bit time for optimizing and customizing Hammer for your personal style of working you can work much better and faster with it.

I will give you a few simple steps to improve your work flow but don't forgot the most important one is practise and this you just get by doing, and maybe you have made some other experiences or thoughts how to improve your work flow. When fell free to write them in the comments or send me a mail.
  1. Plan your map before you start in Hammer, that reduces you idle time at the keyboard and reduces the risk to rework things. So that you can spent all your time in the editor at maximum speed!
  2. Compiling costs time! Try to reduce your compile time and compile just these parts of the map you are currently working on (use the Cordon tool) and just compile vis and rad if you really need it. For Brushwork and layout tests a .bsp only compile is enough.
  3. Use the Cordon tools! You should not just use the Cordon tools for compiling it is also wisely to use them to select the parts of the map your are currently working on. This creates a much clearer 2D view and improves the Hammer performance.
  4. Take notes if you find bugs so that you remember them if you want to fix them later or on the next day.
  5. Use shortcuts as often as possible and don't waste time on moving your mouse around. You can watch them on Valves wiki. To better learn them I created and printed myself a Hotkey_Reference.pdf that makes it easier to look at them.
  6. Set up your displacements wisely. Plan them before that will save a lot time than optimize them later on.
  7. Paint displacements in the face normal mode. You can change the axis from the face-normal by alt+right click on a face or displacement vertex. So you will waste less time on painting the displacements.
  8. Use visgroups wisely. Turn off models or tool textures and co every time you are not working with them, because they often just block your view so that you have to waste time moving around them and so on.
  9. Create own visgroups and call them wisely this will help you to make your map more clear and help teammates who are maybe working on your map to understand your work.
  10. Optimize your map from time to time and make complex brushes to func_details and reduce the lightmap scale there ever you can. This will reduce you compile times.
  11. Create Prefabs for things you use often in your map (in newer SDK versions you should use instances). This needs less time than creating this things every time again or to copy them.
  12. Create Brushes first with a nodraw texture applied, and texture just the sides that are visibly in the map later.
  13. Activate Snap to Grid under Map in the upper toolbar.
  14. Work on a 16 grid. And 8 - 4 grid for details and only us a finer grid if it is really necessary.
  15. Don't use the carve tool.
  16. Displacements must sew. Check if everything is sewed correctly before compiling.
I hope this few tips will help you to improve your work flow. If you have made different experiences or have some other tips, I would really like to get some feedback from you ;)

So far greets from my side and bye for now :>

Sunday, May 19, 2013

Stay on the Track (2) Story and Gameplay

Hello,
in my second post about my project Stay on the Track I want to tell you the Story and the Gameplay idea behind the map.
After I decided to use the Western setting for the map, the question was, why is the map placed there and what is the story behind that?
My luck is, that it´s not really one of my problems to find ideas, so I found really fast a few possible ideas for the story of the map and a gameplay use for that.
First I couldn´t decide what would maybe a better solution, a fight for precious metals or oil or maybe a war with Indians? But the base theme for the application was "track". 
Okay Oil? Yeah the railroad is the main supply line to get the oil from the oil field to the refinery's. So maybe a competing company is trying to sabotage your railroad and you have to protect them? Remembers me a bit on "There will be blood".
Yeah what would be a nice story but oil was discovered real late in the wild west times and I wanted to create a real cool Western style map with steam trains and cowboys. And so I thought a bit more about the story. So if you think about the Wild West, what are you imagine? 
Cowboys, horses, freedom, bandits, Indians. Right?
So that I finally come to this story:

The map puts the player in a fictional town called "Last Sun" in the Midwestern United States around 1880.
This is close to the "frontier", the border of Indian Territory. It has only a few hundred inhabitants,
which either try their luck as a rancher, or employees of the railroad company
which route leads through the village.  
The city lies on erstwhile Indian Territory,
from were the natives were expelled by the settlers behind the "frontier".
The proximity to the Indian Territory and the associated hunting areas 
have settled some hunters, fur traders, Interpreters and trackers
and a few shady characters in and around the city.
The railroad is used by the inhabitants to transport the goods, so that the railroad soon become the stream of life for the city, and also brings more money and people in the city
In order to increase their wealth, the settlers ordered to continue the construction of the route
over the border into Indian territory,
whereupon the Indians respond with attacks on the trains.
This breaks out a bitter battle over the railway line.

To formulate this text was much harder than the idea itself :D
And whats with the gameplay? Yeah the basic gameplay idea you should have already identified in the story about the map. Your goal as the player is it to defend the trains at all costs to prevent the goods of the ranchers and settlers. Source is mainly a Engine for shooter and small maps, with wide open areas source got its troubles, so how I could realize this gamemode. To defend trains you need open wide areas. To realise this and to finish my project soon enough for the application I decided to create just the city Last Sun from which trains start over the frontier. This was feasible and would also give me some more opportunities for the gameplay at all.

The basic idea of the level is to place the player in a part of an open world rpg in which the level the centre for the missions is. But the main goal for the player is to protect a train until the reaches his goal, Stay on the Track. 
For this are a few special places in the city there the player can get special things and so on.
The train station for example is the starting point for a lot of missions. Further the church is because of its height a good landmark from which the player can find from every place of the level back to the city.
In the manor house in the back part of the city there the probably richest rancher of the region lives who has triggered the conflict between the settlers and Indians in Last Sun.
In the sheriffs office the player has the opportunity to take up missions in the name of law and order, or leave the prisoners in the jail.
In the bank the player can save his hard earned money. And in the shop he has the opportunity to get all the new stuff he need to survive in the outback from supplies to weapons up to ammunition.
The Saloon is like the train station the starting point for many missions. There is also the right place to talk to other settles to get the newest information's, to consume the drinks inventories of the owner or to instigate a real bar fight.


Why I made myself all the work to write down such a background story? That is easy, if you want to win someone for your project (and that was more or less my goal with this application) you have to show him in an easy and understandable way what you try to achieve with your work, and why it is also interesting for him. If you have a background story it is much easier to explain your map to others. And also it is much easier for yourself if you write something down on what you can be focused later.

I hope its readable, because I think in German this was a bit better to read :D

So that's enough text for now, in the next part I will show you the different stages of the development, that means less text, and more pictures :)

Wednesday, August 1, 2012

Workflow improvent in Hammer (1)

Improving your workflow is not hard if you just want it. And there are many ways to do this.
Shortcuts (Hotkeys) are a great thing to improve your workflow and to get faster results of your work.
But for that you have to use them! Yeah that is my problem, I don't really use them in Hammer. In other programs like Blender I work nearly complete with shortcuts but in Hammer I never get used to it. Hammer is a great tool for beginners to get started, with the small UI and just these less buttons, so I never considered it for necessary to use shortcuts because it was just so easy, just to use the mouse.

But this changed the last weeks there I thought a bit about useful things to improve my mapping workflow to get my maps faster finished. One important thing to make progress as fast as possible is of course a good planing before you start to create your map itself in the editor. I learned that as I worked on my Application map (Stay on the track) that was the first time were I invested a lot of time for planing before actually starting to create something in Hammer, and yeah I got less problems by the mapping and polishing. But about the planing stage I will write another blog post because it is to complex to put it in here as well.

First I want to give you some tips to better configure your Hammer itself.
Go to Tools>>Options
  1.  Enable Autosaves. And set one for you reasonable amount of Numbers of iterations to save and time between the saves. So that you always have a version of your map saved then your Hammer or Windows crashes, else all your hard work would be wasted. And who wants that?
  2. I also recommend a high amount of undo levels if you made something wrong you can go back. But don't forget that your machine also needs to have enough ram for that.
  3. Enable the default to 15 degree rotations in the 2D view. So it is much easier to fast rotate something exactly. If you want to rotate without 15 degree steps just press Alt while rotating.
  4. Disable Draw Vertics. So your 2D view just draws vertics from the brush you have selected. That makes your 2D view much cleaner and easier to work with.
  5. Enable Visgroup colors for object lines. That makes it easier to differ map areas from each other and makes it easier to keep the overview on big maps.
  6. Enable Center on camera after movement in 3D. So you don't have to adjust your 2D view every time after changing your camera position in the 3D view.
  7. Increase Distances. You should also increase the Back clipping plane and Model render distance in the 3D Views so that you can see more from your map on your 3D view, but remember this costs performance and that your machine has to handle that. If your Hammer lags, it reduces your productivity.
  8. Disable Animate models. Animated models in Hammer are just obstructing, and remember this also costs performance.
  9. Increase the camera speeds. A high Forward speed makes you moving faster around your map, less wasted time. Also increase the Time to top speed useful if you just want so make minimal adjustments. I recommend values about 6000 and 1 sec.
  10. Adjust the FOV. Match the FOV you use Ingame with the FOV you use in Hammer, else you may wonder later why things ingame looks different than in your Hammer.
If you got more than 1 Monitor and want to use Hammer on multiply monitors you can also do this. Just go to the Options Menu again and check the Use independent window configurations and Load default window positions with maps under the General tab. This enables you to drag the Hammer to the size you want it. Then use the Window button in the upper toolbar and New window to add a new window in Hammer for a view port you want. Add as many windows and configure them like you want. I recommend a single monitor just for the 3D view and all the 2D view on another. After arranging everything just press the save Window state button (the blue one with a S in it) in the top toolbar, and you are done.
But badly Hammer cant go full screen, you don't have to try that, this is the reason why I personally don't use that. I use my other monitors just to show references. But for ATI users like me there is also another option, just create a eyefinity profile for Hammer. In this case Windows use all your monitors as one and Hammer goes full screen, but I don't know if the same is possible for Nvidia users.
I also can recommend to use the expert mode for compiling in Hammer with custom profiles. It is a good idea to create custom profiles for different situations. As Example I have my own presets for leak detection brushwork and layout checks were I just compile .bsp and also different light presets for any situation I could need. With a good preset list you can compile much faster, than every time adjust the compiler again. But I personally don't have to use the Hammer compiler often because internal in our mod we use a set of own compiling tools :)

It is also useful to assign the Hammer Editor in Windows as default program to open .vmf file types. But be sure to select the right Hammer.exe for your Engine version, as example, for mods you need the 2007 Hammer.exe (Steam/steamapps/yourusername/sourcesdk/bin/source2007/bin). And if you have problems to load the right default sheme, there is a solution. That makes it much easier to open your maps to do quick fixes.

So that´s it for now from my side but I think this post is now long enough ;)
I will continue this in another article soon, so stay tuned.

Monday, July 23, 2012

Stay on the Track (1) Introduction

Hello,
in my first real blog entry I want to tell you something about a map I have created for an Application for a university of applied science where I applied for a Games Creation course of studies.
I will write more than one post for this because I want you to get a bit more detailed look at the whole progress I have made through the creation of this map and show you a few more pictures for that, and this would just blast a single post.

The theme for the Application was "track". What exactly we have to do was our own choice as applicant, it just had to be something about Games and should have a location and time.
So I decided to create a map because this is were I have the most experience in. The time to learn mapping on  the Unreal Engine or Cryengine was a bit short and I wanted to have something more in my portfolio than just the maps I have created for The Stargate Mod so I decided to create my level with a newer version of the Source Engine. Because in Source I have the most experiences.
My final decision was Counter Strike Source because it has one of the newest Engine versions and a big amount of useful models and textures for my project that would be useful if I have not the time to create everything by my own (looking back that was a good decision :>).

 The first thing to do was to get an idea about what setting the map should have.
At the beginning I had a few ideas about what I could create based on the theme track,
  • A long journey, with a mountain or Forest setting?
  • Industrialisation, first railroad in Europe?
  • Space, a spaceship on a long travel through space
  • Stay on the Track, railroad, USA, mid 19th century


Some screens from my brainstorms, but in German.

After a lot of thinking and searching the web I decided to use the Stay on the Track idea would be the best choice. So I started to detail the idea and bring more background information's into it to create a deeper story and to show my progress and what I thought at the time with Mind maps again.

 To get useful ideas and background information's I "googled" a lot but my main source of information's for a useful background idea I took from wikipedia and the website from the Karl May foundation. And all these information's and ideas I collected by searching and thinking I put together again in two new Mind maps.

I hoped that this planing would get paid later in the creation of the map because I got a more clear idea about what exactly I want to create, and that this will also help the guys who watch my final map to understand what exactly I have tried to create. And by the way it seems that this idea was a good one because after I sent them my application with this map I was invited for an interview ;)

But that's it for now. I will show you the next progress stage in another blog post soon.